A tutorial for this way cute version can be found at the Ribbon Retreat blog.
but don't quite have the guts (read: me), I've cooked up a grown-up version for the little girl in all of us. I introduce you to - The Tutu Belt
That's Gladys, by the way. Cute, ain't she? Wanna see how it's done? Read on...
Gather your materials:
1 - Fabric for the main belt (honest truth, I used the leg of an old pair of khakis that had split at the bum.)
2 - Tulle
3 - Ribbon
4 - Buttons and/or rosettes
5 - Elastic hair bands
To make the main portion of the belt, measure your waist and then subtract one inch. This will make it so that, with a 1/4 inch seam, you'll end up with about a 1 1/2 inch gap between the ends of your belt. Cut two strips of your fabric that are 3 1/2 inches by whatever your waist measurement was minus one inch.
Cut a strip of tulle 3 1/4 inches by (your waist measurement) x 2 + 10 inches. This should give you enough to make a nice subtle ruffle.
Ok, so first you'll want to put your two main belt pieces right sides together, pin, and sew up three sides, leaving one of the short sides open. (Use about a 1/4 inch seam.)
Turn that right side out and iron.
Tuck your open end under and iron it down, but don't sew it yet.
Place your two elastic hair bands in the opening and pin, like so:
The pins really only get you to your sewing machine - once you get there, they're kind of in the way and you have to take them out to sew. So I suppose you could pin them a little further in, just make sure you grab those bands. Anyway, I'm sure there are lots of easier ways to do this. Trial and error. So yeah, sew those puppies down.
Next, grab your length of tulle and set your machine to a basting stitch. Pull out your top thread and your bobbin thread a bit so you have something to hang on to when gathering. Baste all the way down the middle:
When you get to the end, pull your threads out a bit before cutting them, unless you're expert at tying knots with only a tiny bit of thread. I'm not. So then, cut and tie a knot. Grab the bottom thread at the other end, hold on to it, and start scrunching up your fabric. Scrunch it all up until you've got a nice ruffle. Arrange the now-ruffled tulle on the main belt, and pin:
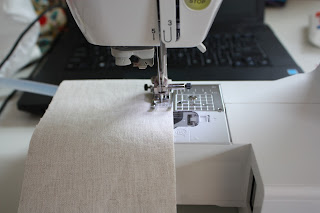
Then, quick and dirty, just sew it straight up the middle:
Next, arrange your ribbon on top of tulle so that it runs down the middle of the belt, and pin.
Tuck a little piece over each end so that it looks nice and finished.
Make sure you have matching thread in your bobbin and for your top thread, unless you want the stitching to stand out. Then, getting as close to the edge of the ribbon as you can, sew it down all four sides.
Almost done! Now, find your cute buttons - I didn't have any buttons I really liked for this belt, so I grabbed some buttons that were about the right size and glued some rosettes on (for which I used this tutorial, just made them with one inch strips of frayed-edge fabric).
Sew on your buttons, and ta-da! You have a grown-up girl tutu belt. Enjoy!


6 comments:
That's pretty stinkin' cute! Where did you get the idea?
I just had some tulle and was trying to think of how I might use it up. I started thinking how it would be fun to wear a tutu, then tried to think up a more grown up version. Thus was born the tutu belt. :)
<3 This is so darling!
Char, I LOVE this! If you make one with black tulle and buttons that aren't too big (I would wear it over dresses/cardigans to work), I would totally buy it... :)
Elissa - as soon as I get my machine back from the shop, I'll get working on that. I think a black one would be really fun, too.
Haha I just noticed this! Your tutu is way cuter than mine! And you can wear yours! I wonder how a tutu belt would look around this ridiculously large belly I'm carrying right now. :)
Post a Comment